
-
New Commercial Services Section
We have now opened a commercial services section here on the forum for registered users. If you have a Fabrik project that you wish to have someone work on for you, post it under Help Wanted. If you are an application developer and wish to earn some money helping others, post your details under Fabrik Application Developers.
Both of these are unmoderated. It will be up to both parties to work out the details and come to an agreement.
-
Joomla 5.1
For running J!5.1 you must https://fabrikar.com/forums/index.php?wiki/update-from-github/ or include the new file manually https://fabrikar.com/forums/index.php?threads/joomla-5-1-and-fabrik-cannot-find-files-error.54473/post-285151 See also Announcements
Google Map element
- Views Views: 22,127
- Last updated Last updated:
-
Contents
The Google Map element allows you to show a Google Map appropriate for the record e.g. to show a customer's address on a map.
NOTE:
As of June 2016, Google require an API key to use google maps, which you can obtain from Google (you need a Google account).
The API key is free (at time of writing: Jan 2020) but you must set up a billing account
Make sure you meet all requireries from https://developers.google.com/maps/documentation/javascript/get-api-key#key.
Google Static Maps API + Google Maps Javascript API must enabled.
If you want to use geocode you must also enable Google Maps Geocoding API.
Once you have your key, enter it in the Fabrik global Options, see https://fabrikar.com/forums/index.php?wiki/options/.
NOTE that certain advanced features, like geocoding and radius widgets, currently will not work if the map is in a repeated group. We are gradually working on making all of the map element features "repeat friendly", but you should test any specific features your app may rely on before committing to your app design.
Form Examples
A Simple Example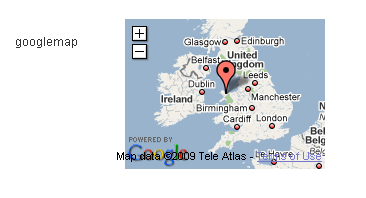
A More Complex Example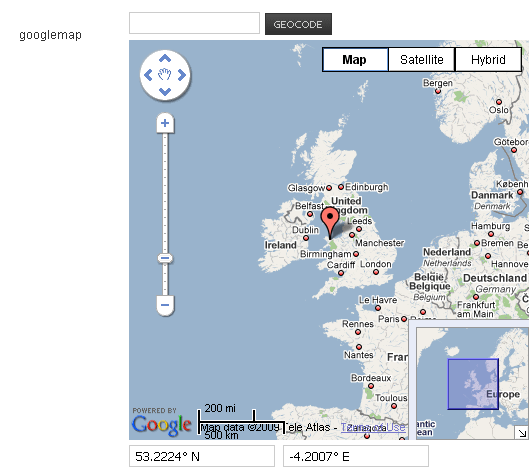
Settings
Main Options
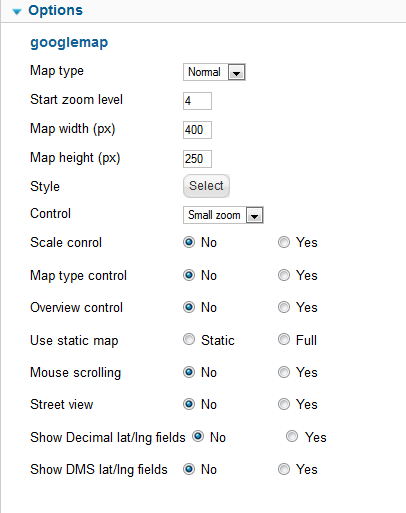
- Map type-
- Normal - shows the map with roads
- Satellite - show a satellite image
- Hybrid - shows the roads overlayed on top of the satellite image
- Terrain - shows the map represented as topographical terrain
- OSM - shows open street map
- Start zoom level - default zoom level when adding a new record based upon Google Maps API. Zoom level 0 (zero) is zoomed out to world. Ranges 0-22 or so depending on type of map.
- Map width - the map width in pixel. Leave blank to produce a 100% width map
- Map height - the map height in pixels
- Style - Determines optional styling that can be applied to the map e.g.
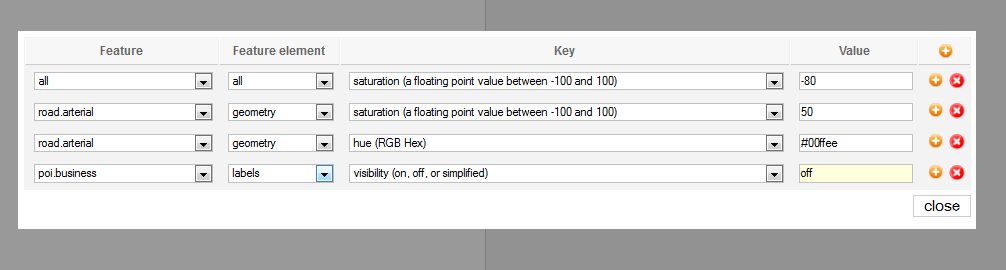
will give you a map styled as (dated - newer google maps appear different):
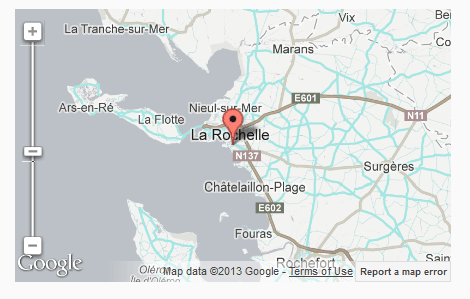
Google provides a Google Map style generator which may help you in setting up the style properties. - Control - the control allows you to navigate/zoom in and out of the map and is placed on the right side of the map.
- None - Don't show the zoom control
- Small - Small zoom control
- Large - Large zoom
- Large map control - Show the full control, allowing you to zoom in and out with a scroll bar and to navigate around the map with left/right/up/down buttons - this is the option used in the above complex example image
- Note: The above controls Large and Large Map seem not to impact current Google Maps - 11/5/2019
- Scale control - Show a indicator of the current map scale in the bottom left hand corner of the map. Clicking on the indicator changes the units.
- Map Type control - Show a control in the upper left corner allowing the user to change the map type (see above for the may type descriptions)
- Overview control - Shows a zoomed out view of the map in the bottom right hand square of the map, which allows you to scroll the main map
- Use static map- if the map is in a detailed view, then this option determines how to render the map.
- Static - Use the standard Google Map static map (a map image served by Google including the marker)
- Full - A navigable map is shown starting at the markers location.
- Mouse scrolling - If set to yes, then moving the mouse over the map and using its scroll wheel will scroll the map in/out.
- Show Decimal lat/lng fields - If set to yes show the markers lat/lng location in two fields underneath the map.
- Show DMS lat/lng fields - If set to yes show the markers lat/lng fields containing the degrees minutes seconds.
- Auto Center - Controls how the map centers. If Yes then when you drag the marker, the map will center on the new marker location. If No, then the marker will stay centered.
Default Location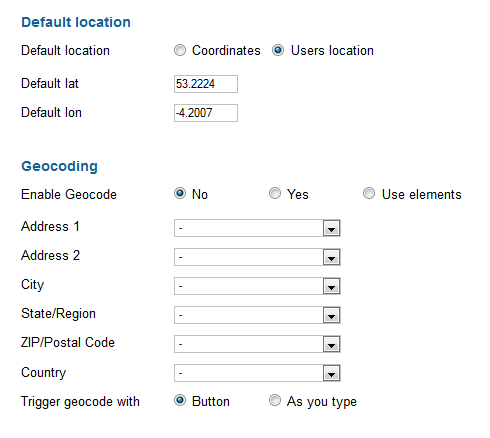
- Default location - Determines how the default location is defined
- Coordinates - Uses the coordinates define in the default lat and default lon fields
- Users location - Asks the user if they want to use their current location.
- When using Chrome you must be accessing the website using a secure link - i.e. https://. Chrome does not allow sharing of information on to non-secure websites. This behavior is the same on Android and Windows.
- Note: if the browser or device you are accessing from is set to disallow sharing users location, then the location in Default lat and lon will be used.
- Note: many computers will a location determined by the ISP or network hosting site, not the physical computer location, so this may not work in that case.
- Default lat - default latitude when adding a new record. Format should be decimal degrees with no formatting (such as degree symbol or direction)
- Default lon - default longitude when adding a new record
GeocodingGeocoding is the process of looking up a lat/lng location from a given address.
- Enable geocoding
- No - Disable this feature
- Yes - Enable this feature, a field will be placed above the map. The address typed in here will be used as the geocode address.
- Use Elements - Geocoding will be turned on but will use the data entered in the Elements selected below to geocode the address.
- Note: Geocoding works based on generic searches as well as address. For instance, if you type a location of a store in a town, and Google can determine the location of that store, the map will pan to that location.
- Address 1 ... Country - Select the Elements you want to use to geocode the address from. Used when enable geocoding = use Elements.
- Trigger geocode with-
- Button - Adds a button above the map, labelled 'Geocode', pressing this will trigger the geocode lookup
- As you type - An ajax request is sent to trigger the geocode lookup each time text in one of the geocode fields is changed.
- Reverse geocoding
- If Yes, then as you move the pointer on the map, Google will attempt to determine and address of the location under the marker and will populate that in the Address Elements.
- Formatted Address - This field will receive a fully formed address from the reverse geocoding as well as the other Elements under Address 1 ... Country, if specified.
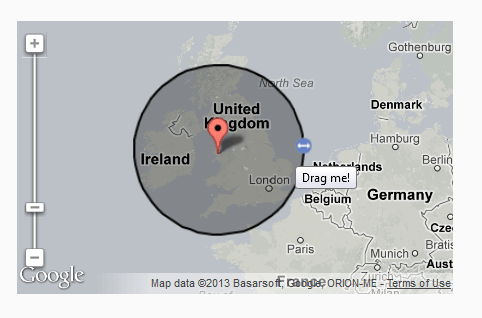
Radius Widget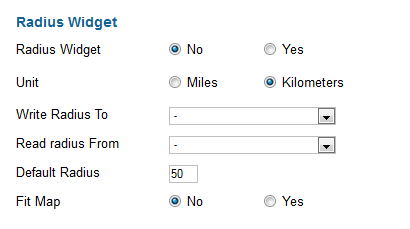
- Radius Widget Add drag-gable Radius Widget to pin
- Unit Miles or Km
- Write Radius To - select an element to store the radius value
- Read radius from - lement to watch and update the Radius Widget from when changed. Can be the same as Write Radius To element.
- Default radius - If not using read or write Elements, default distance for Radius Widget. If using Elements, Read element value will be used in preference to Write element value.
- Fit Map - Zoom the map to fit the radius, overrides specified zoom level
List Settings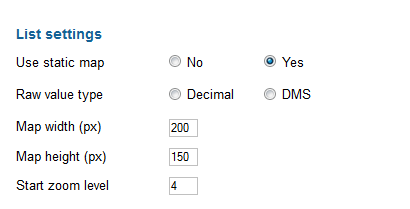
- Use static map -
- Yes - A Google static map image will be shown, indicating the marker location
- Cached - The static map will be cached on your server to prevent repeated maps api calls
- No - The raw coordinates will be shown
- Raw value type - If use static map is no then show the location as decimal value or as degrees minutes and seconds.
- Map width- the static map width in pixels
- Map height the static map height in pixels
- Start zoom level - static map's zoom level
Tabs and PopupsIn certain circumstances, for instance when using tabbed or popup layouts, the map will not display correctly if it was not visible when the page was loaded. This is a known issue with Google maps, and not really a Fabrik "bug".
For Fabrik's built in popup and tabbed displays, this is handled automatically. But if you are using your own custom ways of putting the form in a popup or a tab, and it isn't visible on the page when the page is first loaded, you will have to handle redrawing the map when it is displayed.
Here is an example of doing this for the UIKit framework, which fires an event (uk.modal.show) when it opens a modal dialog. So we need to hang some event handling code on that. In this case, we are using jQuery code to do it.
In this case, the #your_uk_modal_div is the ID of the container which has the uk-modal class, in which your modal content (incuding the Fabrik form) is located. You would simply replace that ID with your div's ID, replace 123 in the form_123 with your form's numeric ID, and yourtable___yourmap with the full element name of your map element. The fconsole() line is just for Debugging purposes, so you can see in a debug console when the event fires, you can delete that once the code is working.Code:
jQuery('#your_uk_modal_div').on({

    'uk.modal.show': function(){

        fconsole("Modal opened");

        Fabrik.getBlock('form_123').formElements.get('yourtable___yourmap').redraw()

    }

});
Most tabbing and modal plugins or frameworks provide this feature, of firing an event or a callback function when the tab is selected or the modal is opened. It's just a case of working out how to utilize them, and run that one line of code that runs the redraw() on the map. - Map type-